Inserting and Editing Jedox Views
Views in Jedox Add-in for Excel 365 are static, as they are inserted into the spreadsheet without PALO functions, while preserving their familiar manipulation capabilities such as splashing (data entry), expand / collapse, Zero Suppression, etc. They are not updated with each Excel auto-calculation, giving you more control over modifying their content.
Insert a View
Once connected to your cloud instance, you can insert an existing View from the stored View option or create a new View, both available within the Jedox Add-in ribbon and task pane.
To display the stored Views, select the respective server / database and cube. When you hover over a stored View, you can pin or unpin it for quick access from the Home section.

When you choose to create a new View, the task pane on the right will ask you to first select the database and cube, and then the dimensions and elements you want to display. Alternatively, you can start by adding all dimensions to the POV and rearrange them as needed.

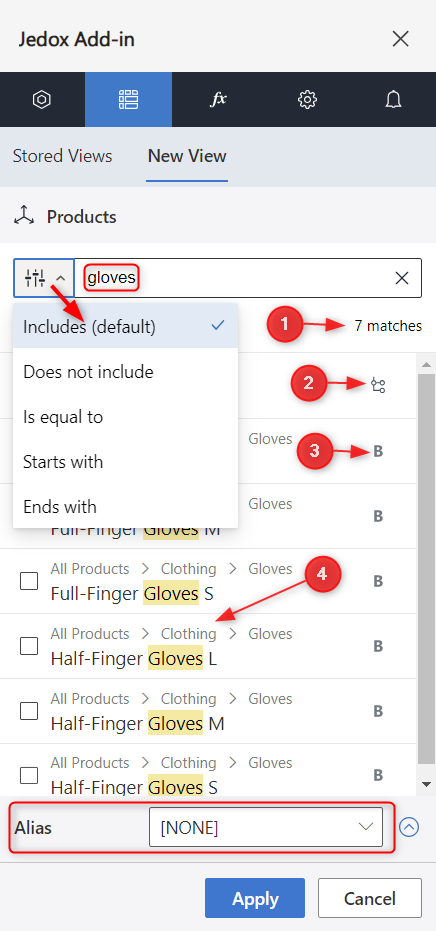
Selecting elements of a dimension, you can use the search functionality to search for specific element names or aliases. You can filter the search ( ) to include, to not include, to be equal to, to start with, or to end with the entered term.
The search result will display how many matches were found (1), whether it is a consolidated element (2) or a base element (3) , and at which path the element is located (4).
Click on the Apply button to insert your choice or Cancel to revert.
To save your new View, you must use the Save as option by clicking on the ![]() icon at first. Any further changes on an existing View can be saved by clicking on the
icon at first. Any further changes on an existing View can be saved by clicking on the  icon.
icon.
Watch the video on Enhanced Element Search.
Edit a View
You can also change the content of a View via the Edit View button.
When editing the View, there is an option to enable Live changes, eliminating the need for previews and displaying changes instantly. When the option is enabled, the Apply button will be hidden.

Within the opened task pane you can rearrange the selected dimensions via drag-and-drop or select specific elements via the  icon.
icon.
On the right-hand side of an element level is the context menu  . From there, you can expand and select the related branch or select a specific level of the dimension (with a maximum of 5 levels that can be displayed).

You can also select multiple POV elements, choosing which function to be applied (Sum, Minimum, Maximum, or Average).
In addition, you can change the content within the View with splashing (data entry), expand / collapse underlying child elements (by clicking on them) on rows and columns, use Zero Suppression, and clear cell content.
The View last refresh date will inform you about the last update on the View's content.
If there are multiple connections, the recently used Views of the active connection will be hidden or deleted as soon as you disconnect or delete this connection. In addition, the View displayed on the spreadsheet can no longer be edited, and any attempt will trigger the "Connection not found" error message.
Keep Only
After inserting the View, you can quickly change the analysis focus by keeping only certain data elements. The Keep Only button will be enabled as soon as you select one or more elements of a dimension. This feature cannot be simultaneously applied to multiple dimensions or to rows and columns. To revert the changes, you must edit the View from the task pane.
Notes on using Keep Only with nested dimensions:
- This function can only be executed if all selected elements belong to the same dimension.
- If the selected elements belong to an inner dimension, the elements of the outer dimension will not be affected by the new selection.


- This function cannot be executed if the same element is selected multiple times within an inner dimension (i.e., the same inner element belongs to different outer elements).


Drillthrough
To access additional relevant information that is not initially presented in your View, select an aggregated cell and click Drillthrough. The detailed base-level information behind the aggregated data will be loaded into a new sheet labeled Drillthrough.
Note that you can only utilize the Drillthrough functionality within Jedox Views.
Watch the video on Drillthrough for Views.
Subsets selection
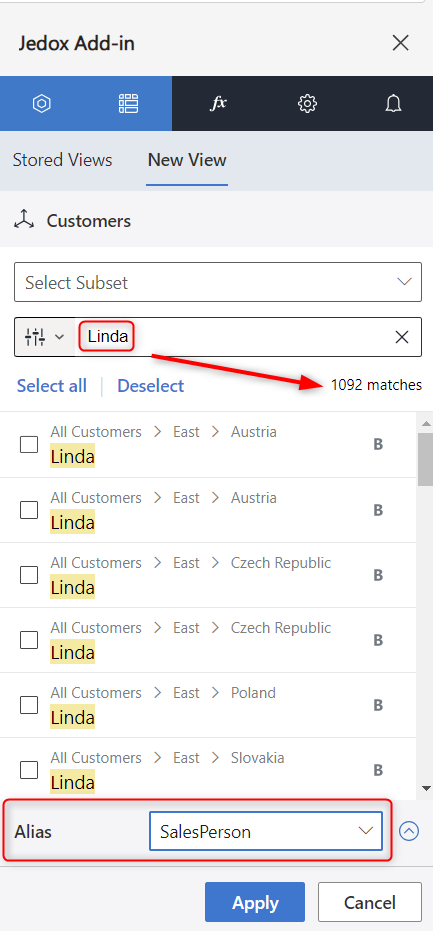
If the dimensions you are accessing contain global stored Subsets, the option to insert them will be displayed in the task pane when selecting elements. You can insert them with element names or aliases. Private stored Subsets are currently not supported.
If the dimension does not contain stored Subsets, the selection field will not be available. The creation and editing of Subsets is not supported.
Watch the video on stored Subsets.
Lists selection
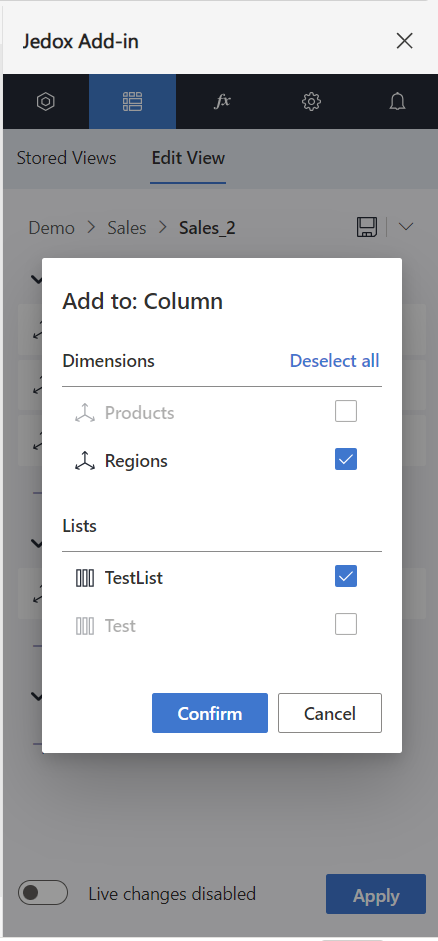
Furthermore, available Lists can be added to rows, columns, or the POV. Selecting a List will block the selection of dimensions that are statically used in that List, and vice versa. The creation and editing of Lists is not supported.
For more information, see What's new and Features in Add-in for Excel 365.
Updated November 4, 2024